Sunday, 19 August 2012

Bungendore Market Day steam special

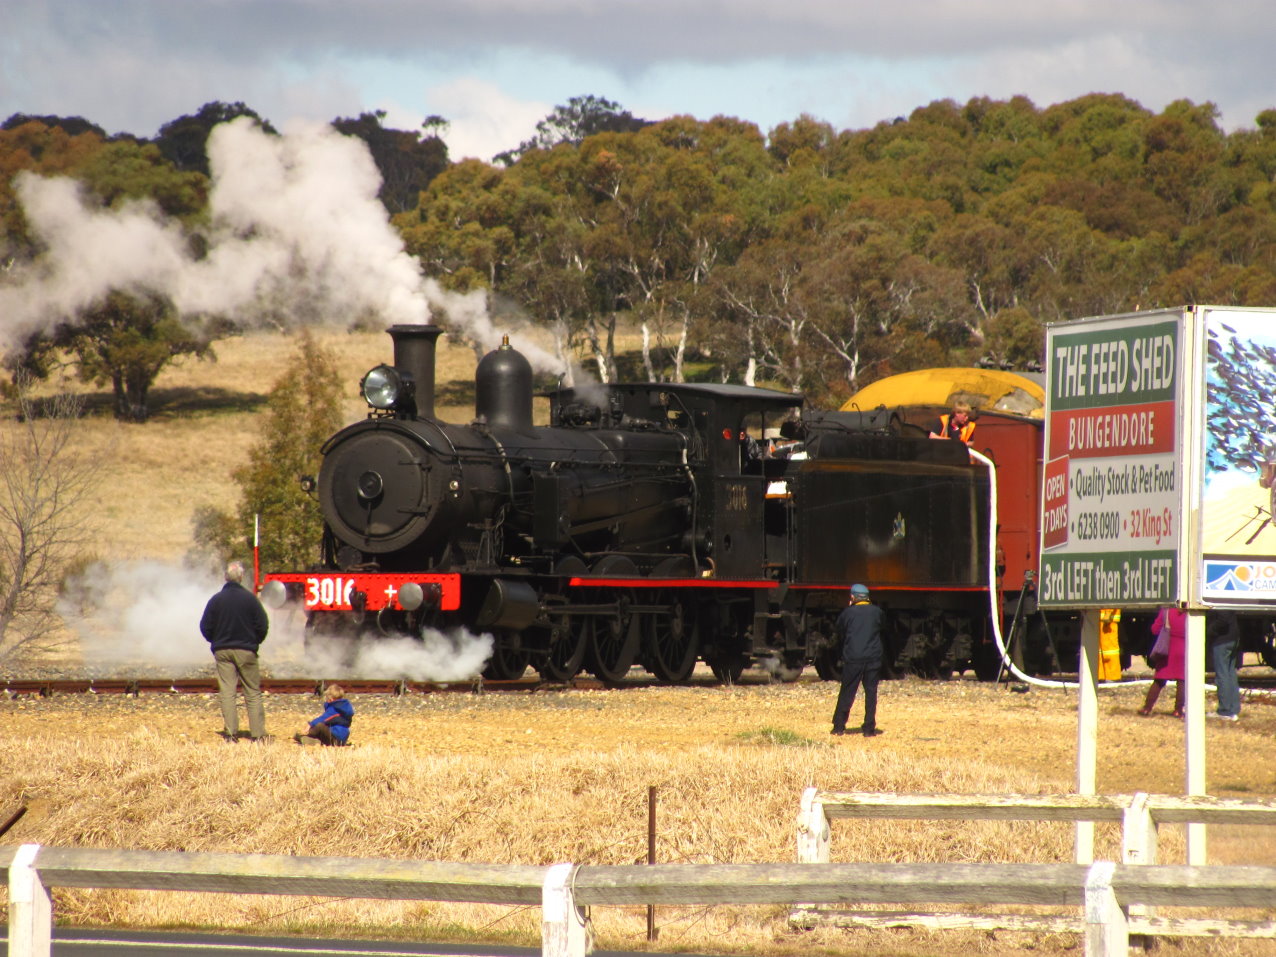
Courtesy of my wife who wanted to attend the Bungendore Sunday markets, our family went on the Bungendore Market Day steam special today. It was quite the adventure and we learnt a lot about trains in Canberra, passengers and Bungendore Markets.


Steam trains in Canberra are run by the ARHS, ACT Division and are somewhat at the mercy of Railcorp. Setting aside the rich history of rail in NSWGR, ARHS has to be doing the right thing to maintain access to the rail assets that allow them to run specials out of Canberra station. This means staying behind the yellow line :-) A funny thing though is that no maintenance is carried out by Railcorp on the line to Bungendore, at least in terms of trimming the greenery, making it bad to lean out the windows any at all, not for the usual signs and infrastructure but for foliage. Budding wattles are just the thing to tear at you and your belongings, or would be had I not ducked back in time.


The full feed first class experience leaves you with no need to lunch at the markets and it was a good thing to as we had limited market time after a somewhat late exit from Canberra Station. Giving passengers coach numbers AND putting the numbers in the coaches would help people alighting at departure and ease the burden on the ARHS volunteers I am sure. First class does not quite have the cachet one might desire when Little Johnny in the row of seats behind is "hungry" despite the spread of morning and afternoon tea being more than enough for my teenage son whose legs require some filling. Luck of the draw and the challenges of parenting and passengering in the modern era I guess.


There may be a fine book store in Bungendore that is not a firetrap with enough dust for a family of asthmatics and enough dark corners to satisfy Australia's love of nocturnal mammals but we visited the other bookstore. The one that was all those things and more, having driven past many times before and been curious, our curiosity is now truly satisfied. The markets at the town hall was full of friendly people selling a variety of things such that we came away with a tray of baked pastry things, floor mats made for fair trade by families in third world countries, wooden coasters, a hand towel for the oven, capsicum relish, goat soap, a huge avocado and a potted pansy. Be warned there is a lolly shop on one of the main streets that sells all those odd things you can only get in proper lolly shops. Sadly we did not have as much time as we might have liked but then time is money and in this case not having enough time may have saved us money. That and meeting a bookshop where we did not buy any books and will never visit again.


3016 did a great job of handling things and with a breather to build more steam on the return rise and a beautiful hill start (no slipping the clutch or handbrake here folks!) the trip was made in good time through typically Australian country side and many photos were taken, and many discarded :-) Enough ramblings, here is a selection of photos of our day with much thanks to ARHS, the marketers of Bungendore and my family who put up with smoke and ash for a good day out.




Saturday, 4 August 2012

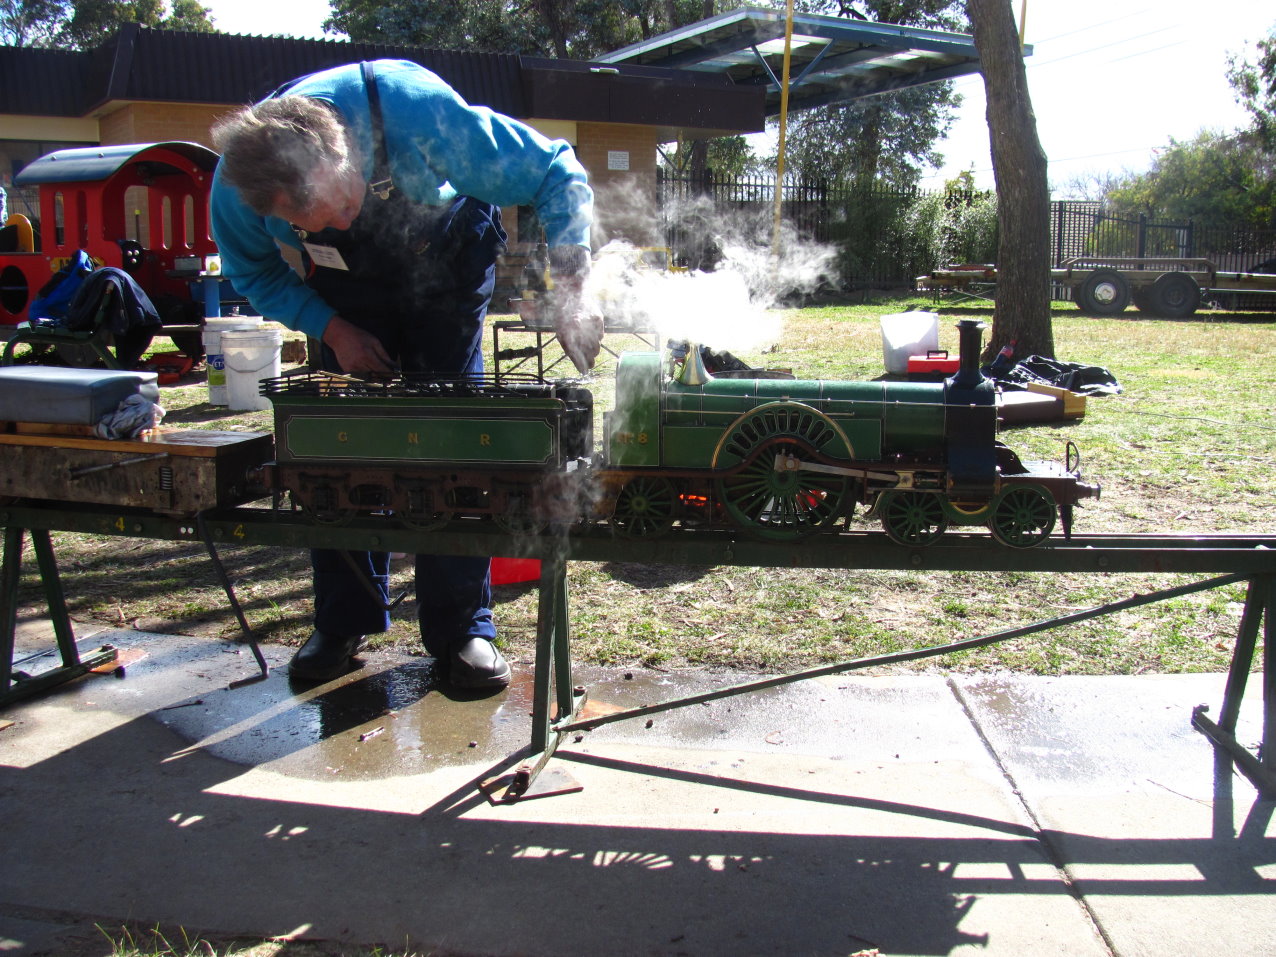
Malkara Scale Model Exhibition 2012

We are just back from Malkara Scale Model Exhibition 2012. Bad photos deleted and then the rest uploaded to the PC and a cup of coffee to sip in the balmy 16 degrees inside versus 12 outside. So this year, for reasons unknown to me, no boats and pool at Malkara :-( Cars n trains but no boats. Also seemingly less vendors but maybe more exhibitors, not that I have compared the programs to be sure, just a gut feeling.


Purchased two razor saws (42 TPI and 52 TPI), some Kadee bogies and some whisker #148s for me. Why the razor saws? Tried to, "remove the moulded vacuum cylinders, 'V' hangars and battery boxes" from my OO scale Dapol Autocoach with my usually trusty FatMax blade. The hardest part, "not to break the truss rods or damage the sole bar" They didn't mention thumbs but managed to damage all three :-( So hopefully, less damage will occur with the razor saws and with some styrene painted black to repair the truss rods, all will be back on track (pun intended) to continue with the detailing kit


Would have loved a camera that had a more customisable flash (able to be angled for bounce for example) and/or a wider aperture for low light while keeping shutter speeds short. Some shots I am happy with can be found below.


Trying to find information about US prototype seems much more of a challenge compared to UK prototype, or at least without resorting to Kalmbach resources, not that there is anything wrong with that but I do wonder if they have somewhat of a monopoly on published material on trains big and small.


The 1200 * 1200 layout for 16.5mm guage continues to progress with a better wood saw to cut the uprights: it seems good tools help make work easier and or better, who would have thought?


Sunday, 24 June 2012

Coaching or Carriaging if you live in the U.K. or commonwealth

A fun part of railroads, or railways if you will, is that there tend to be two sets of terms for English speakers: a little similar to Micrsoft's concept of English (United States) versus the Queen's English. Carriages in the U.K. become coaches in the U.S.A, goods trains become freight trains, bogies become trucks, points become switches and so on. Not helped by Australia picking up a mix of both and I in particular model in both prototypes. Add to that the divergent approaches to railroading that result in things like buffers not existing in the U.S.A, vacuum versus air brakes, sizes of respective loading gauges and so on, many of the differences not helped by patriotism and/or parochialism.

Anyway, coaching then refers to the work on lighting the interiors of my N scale Overton coaches. The lighting kit comes with pickup springs that required the import purchase of the very fine Fox Valley wheelsets that do not have both wheels insulated as the smooth running Atlas ones (available at my Local Hobby Shop) do. The Fox Valley wheels have machined shoulders on the axles removing the need for any tricky re-guaging so it was a simple case of removing the insulated wheel and slipping on the pickup springs. The number of coils on the axle meant that it rubbed on both wheels, not delivering the promised smooth running. With some trimming the spring coils were reduced in number and smooth running returned.

The next challenge was to ensure that the bogies still rotated smoothly. Drilling out the middle of the pin to accommodate an electrical wire into the interior of the coach. Soldering joined the pickup spring to the wire of the Flicker Free electronics module which in turn are now soldered to the PCB holding the resistor and LEDs.

The next challenges to come are fitting out the interior with a floor, seats and people. Also transparent covering for the clerestory roof to impede the view of the PCB and its fixing mechanism (Scotch Double-Sided Foam Tape) which is bright white in a place where bright white should not be on the prototype. Not to forget that this is the first of three coaches to light in such a way but so far things have gone well enough in the design that I plan to do the same things next time. Lighting my work and maybe magnification may help, also soldering practice.

To capture the work required some playing with settings on my compact camera. As I read up on DSLRs, I have learnt some about aperture, ISO settings and shutter speed and was able to use some of that to get one really good shot that showed the detail around the bogie, axle and pickup springs.

In other news, work continues on the 1200 * 1200 replacement for the 1200 * 900 OO/HO up and over loop. 23 pairs of uprights, each 1/16" shorter than the previous have now been cut. Only 25 more to go...

Sunday, 27 May 2012

Turning tables

So Maitland Steamfest 2012 was a great celebration of locomotives 3265, 3526 & 3642. The race felt more like a parallel run for 3265 & 3526 than an out and out race, add to that the steam locomotive led trains where seemingly blitzed by the two tiger moths. It is good to have tried it though. Maybe it will be better when the two 38s are out of the shop, though 3830 has less to do than 3801 as far as I can tell. The fillum SLR was handy though I was not helped by the film I had being ISO 400. Given I was shooting outdoors, I would have preferred something less grainy but I will have to plan further ahead and shop elsewhere next time.


In other news, I managed to cut a hole in the baseboard for the turntable pit. Step 1 was marking out, step 2 was drill a hole for the jigsaw blade, step 3 was use the jigsaw to cut close to the edge of the marked out circle, step 4 was to then file away the material until the pit fitted. Sadly as a result of not taking the jigsaw up the marked circle a lot of filing was required AND the resultant hole did not end up centred where I wished and the roundhouse now hangs over the edge of the current baseboard :-(


So that great debate of model railroading comes up: do I throw it away and start again or keep it and work around the problem? Starting again means I would learn whether my caution with the jigsaw was misplaced and whether a better result would be achieved if I cut with the jigsaw closer to the marked edge. On the other hand, the overhang is less than 10mm. I could put a piece of pine that I am using as the support for the ply baseboard as a brace along the end where the roundhouse overhangs that would nicely disguise many things, and add strength and bracing. The other advantages of extending/covering/bracing the end are that I would not need to redo any of the above steps, also it means the lead in track on the opposite side to the roundhouse has a little more spare room (~10mm extra track length in N-scale is not to be ignored, ~10 mm of pine is not of so much consequence) Stay tuned for the outcome and further work


As the year reaches its middle, it becomes time to start scheduling some work on the Christmas layout. A few things would be advantageous:


  • Better fastening/clamping of the two halves, something similar to the latches used on audio equipment like so to draw the two sides together with some mechanical advantage.

  • Light the interiors of the "Overton" coaches. This requires the hooking up of the pickups from the coach axles to the input side of the lighting module, affixing the lights to the clerestory roof of the coaches after soldering the lighting wires to the output side of the lighting module.

  • Outfit the interior of the coaches so that the lighting does not show them to be empty. I have many satisfactorily painted passengers and benches, it is now a matter of making a suitable base to glue everything to, painting that and doing the gluing.

  • Fit proper electrical connectors between the baseboard wires and the controller. I like bananas, because they have no bones


The catch with the soldering is the weather outside right now so the other things may get done first :-)


And on that note it's picture time.


Tuesday, 24 April 2012

Part 2: Expos, Exhibitions 'n' things, 2012

Well many weeks have passed since the expo and I have had a chance to think some more.
Do I have any answers?


On the camera front, I have some thoughts: I intend to make use of my old style film SLR for fast shutter speed type work. I also intend to make more use of the tricky settings on my digital compact camera. Sharpening my skills with both cameras will hopefully improve the results, keep me busy and possibly prepare me for a digital SLR, one day.


On the getting things out of model exhibitions, that is a harder question to answer. I suspect that this is because I do not have time in my life to consider joining a club. Most of the layouts at the expo are run by clubs who are running recruitment drives; quietly and politely for certain but nonetheless. Clubs have more space than most of us have so you can build that layout with the large radius curves, long straights and so on. Clubs are able to bring together people with various skills to complete bigger projects quicker rather than one person having to either have, acquire or outsource those skills over time. In a modelling world of hastening gratification (as shown by the current trend of 'built up' structures and so on), this means clubs are the bomb for those who want to model trains in a big way.


A few days from now we will be in Maitland with 3 operating full size steam locomotives and 2 tiger moths. Much family fun to be had, many photos to be taken, much stories to tell I hope. Stay tuned!

Tuesday, 3 April 2012

Expos, Exhibitions 'n' things, 2012

So the Rogers were able to make it to the Canberra Model Rail Expo again this year. Stalls, exhibits, displays, modellers, families, photographers, the works. And what were the outcomes?


Well my daughter has two more Thomas wagons. What makes the Hornby versions so much cheaper than the Bachmann ones? Is it that the Bachmann ones have metal wheels? (doesn't look like it in those photos...) I sure hope not given the price difference in Australia. Anyway. We now also have an Australian National bi-level auto carrier quite like this and at a great price, really we should have bought two...


We also got some good photos and because some things only work that way, we got some video too. My daughter has her own camera and took what would have been better shots on a better camera. Something I was beginning to feel with my point and click.


So I was a little disappointed on two fronts:


  1. I would like a better camera but cannot afford one at this time and

  2. I didn't get a lot out of this expo.


Please understand that it was not so much about the exhibits which were good, the stalls were good too: the 2nd hand stall was well stocked for example and there was a good variety of stalls, models and prototypes (so many countries!) at this expo if you had the bank balance ;-) Possibly it comes to expectation and involvement. I am still not a member of a model club (involvement) and yet that is probably the next step in advancing certain aspects of my modelling (expectation). And yet the main thing that keeps me from becoming a member of a club also contributed to the malaise of this year's Expo: time to model versus all the other priorities of life. And speaking of time, it's nearly midnight and I had better do another part to this later

Saturday, 10 March 2012

Turntables and things

The saga continues. It must be noted that the turntable I have part constructed is a Walthers 120' Manual Turntable. This is actually a rebadged Heljan model. Looking around the net it has somewhat of a bad reputation, especially when compared to Walthers new Built Up turntables that are dcc ready, fully indexed, whiz bang, etc. Is it just my love of building kits and attempting to scratchbuild that set me apart here? I have not completed the installation so I cannot speak about end results yet, but here is the story so far and the plan ahead.


The turntable bridge is fully constructed, from the turntable pit up at least; I have not fixed anything to the bridge that would lock it into the pit yet. Currently I have a length of micro-engineering bridge track cut to length with chamfered ends and stripped of some sleepers ready to have wires soldered on underneath. After some drilling, the turntable bridge has a small hole close to the centre to receive the track wires. I plan to electrify the turntable bridge tracks using the split ring method, as outlined by the Turntables section here. This will mean the turntable bridge track will have the correct polarity as it rotates. The Walthers/Heljan kit comes with two rings and some instructions about wiring. I am not sure how two complete rings, one for each track, allow you to wire a turntable bridge. My plan is to make one ring a split ring with some judicious hacksawing and then gap filling with styrene. Given there are two rings I guess I have two chances to get this right :-) I do not plan to motorise the turntable for a number of reasons, the first being the fuss versus the payoff for a turntable that is not out of reach. Also the lack of underspace for my shelf, the added cost and the apparent difficulty of motorising this kit. Yet for my money the kit best met my N Scale layout's needs: it fits on/in the 300mm wide shelf while being longer than my Berkshire, it looks the part (sorry Atlas, were there really turntables that looked like that?) and suited my budget.


I will need to paint the turntable well ready to receive the turntable bridge in it. Once the turntable bridge track is soldered, the sleepers have been replaced, the guide rails glued in, the track and sleepers weathered, the track affixed at a suitable height to match the approach tracks... Then comes locating said approach tracks and tracks to the roundhouse stalls, working out the wiring for same (I think each stall will end up being an independent block in my non-DCC block wired layout) and so on. Woodwork has yet to be fully completed and I certainly have not cut any large round holes in the plywood shelf yet.


Below is some bad photography of me trying out locations and so on.