Saturday, 10 March 2012

Turntables and things

The saga continues. It must be noted that the turntable I have part constructed is a Walthers 120' Manual Turntable. This is actually a rebadged Heljan model. Looking around the net it has somewhat of a bad reputation, especially when compared to Walthers new Built Up turntables that are dcc ready, fully indexed, whiz bang, etc. Is it just my love of building kits and attempting to scratchbuild that set me apart here? I have not completed the installation so I cannot speak about end results yet, but here is the story so far and the plan ahead.


The turntable bridge is fully constructed, from the turntable pit up at least; I have not fixed anything to the bridge that would lock it into the pit yet. Currently I have a length of micro-engineering bridge track cut to length with chamfered ends and stripped of some sleepers ready to have wires soldered on underneath. After some drilling, the turntable bridge has a small hole close to the centre to receive the track wires. I plan to electrify the turntable bridge tracks using the split ring method, as outlined by the Turntables section here. This will mean the turntable bridge track will have the correct polarity as it rotates. The Walthers/Heljan kit comes with two rings and some instructions about wiring. I am not sure how two complete rings, one for each track, allow you to wire a turntable bridge. My plan is to make one ring a split ring with some judicious hacksawing and then gap filling with styrene. Given there are two rings I guess I have two chances to get this right :-) I do not plan to motorise the turntable for a number of reasons, the first being the fuss versus the payoff for a turntable that is not out of reach. Also the lack of underspace for my shelf, the added cost and the apparent difficulty of motorising this kit. Yet for my money the kit best met my N Scale layout's needs: it fits on/in the 300mm wide shelf while being longer than my Berkshire, it looks the part (sorry Atlas, were there really turntables that looked like that?) and suited my budget.


I will need to paint the turntable well ready to receive the turntable bridge in it. Once the turntable bridge track is soldered, the sleepers have been replaced, the guide rails glued in, the track and sleepers weathered, the track affixed at a suitable height to match the approach tracks... Then comes locating said approach tracks and tracks to the roundhouse stalls, working out the wiring for same (I think each stall will end up being an independent block in my non-DCC block wired layout) and so on. Woodwork has yet to be fully completed and I certainly have not cut any large round holes in the plywood shelf yet.


Below is some bad photography of me trying out locations and so on.


Monday, 20 February 2012

Roundhouses and Turntables

Just a short article that may grow in time, like all layouts will, and mine looks like doing more than I expected; read on... So I was looking at my N-Scale locos which were sadly suffering from settling dust, and I thought, why don't I put them under cover? Out I went to the garage and got out the Atlas roundhouse kit (still in box) and my Walthers 120' manual turntable (mostly assembled, partially painted) thinking I could add a little extension to my N-Scale shelf layout.


Well, after getting out the ruler and tape measure on both models, I was in for a surprise. Quickly the idea of adding the IHC Cheyenne Coaling Tower to the mix was discarded as the extension was already at least another 510mm long, and that was just for the models themselves, not counting any clearance to correctly curve tracks to the turntable or have some edge behind the roundhouse. Speaking of roundhouse, the 3 stall round house was going to leave me a whole 15mm clearance on my 300mm shelf. I know it's a shelf so it's narrow but wow. That's 15mm total, not either side by the way.


So now I am knocking up some wood offcuts to size up how much bigger this will make the layout and whether I will be able to extend it that much without endangering heads due to clearance/elevation/location etc. It is no wonder the railroads have gotten rid of most of these structures once they had no need for them, the real estate must have been worth a fortune. Just check out Two Brother'sfor what you can do with an old roundhouse. Previously known as the Walter Payton's Roundhouse, it is now a historic monument. And the final word, check out the ceiling height!

Monday, 16 January 2012

The simple things in life are often the best

So Christmas delivered such things as a Dapol Autocoach, a book on Autocoaches and a Dart Castings GWR Autocoach detailing kit which provides extensive undercarriage detail to show the workings peculiar to autocoaches. Autocoaches are coaches that when attached to a fitted locomotive, allow a driver to operate the train from the carriage end for visibility without having to turn anything around or take the locomotive around the coach(es). I have yet to commence the hard part of detailing the coach in part because the first step is to remove some of the existing undercarriage. Simple it is not but looks like it will make the coach a much more authentic model.


The counterpoint to the detailing kit (in some respects) is the auto-mobile distribution facility diorama for my daughter. A not quite square piece of plywood with pine edging for some strength and torsional rigidity. This was to be a "simple" painted diorama: no fancy ground cover or textures, no grit to get in wheels, no grass to wear off the surface with use... So first step was to seal the plywood so the colours did not soak straight in with out having any effect. Matt clear spray paint was my best friend here. Then on to the colouring in, as it were. We would need some railroad track area, some road type area, including a carpark, some concrete area for the buildings and of course some green for grass for the rest. Artists acrylics in multiple coats were my friend here. White road lines add a special touch with the simple expedient of using masking to to (what else?) mask off certain areas and leave short dashes down the approximate centre of the roads. To top this all off, more clear matt spray paint and then some clearcoat matt finish to provide some wear and tear to the coloured paint. Then to attach the cork and rails to bring the autoracks and flat cars in on, some double sided tape for the cork and then track pins for the track were a traditional solution here. The "hard" part was then setting up the tracks for the unloading ramp. having cut up some track earlier and drilled trackpin holes, it as a matter of getting the rails to be as close to parallel as possible.


So how did it turn out? Well the best verdict is how much my daughter loves to play with the diorama which was the whole point of making it anyway, while giving an education in trains carrying cars, or autos (a word that appears a great many times in an article about model railroading...)


Wednesday, 7 December 2011

Frameworks and fings (to rhyme with things.. the fact is this is more difficult than I thought)


So in the business of getting the Christmas Tree layout ready, I missed a November posting. But as a concession, the Christmas Tree layout now has ballast on some of the track, ground cover texture, stone/rock coloured cliff faces, dusty snow capped mountains and similarly snow dusted pine trees. Also the wooden base has now been painted to give it a finished look which has highlighted the less finished look of the cardboard sides of the mountains and the very unfinished back of the diorama. So things to do include proper Masonite sides and backing cut to match the scenic profile. Also a better way of ensuring the two halves of the base are brought as close together as possible. Currently there are two possible solutions to bringing together the base halves: adjustable clamps with hooks or threaded rod and washers etc.


But then there are other considerations. After putting some of my longer rolling stock on the diorama, the tight curvature at the two sides really come into play, made worse by the not so well angled or centred tunnel mouths. Tight curvature has many downsides: it looks "wrong", trains are more likely to derail and too tight curves make for hard work if the track guage is not widened to allow for better running. Also about half way round the back of the tunnel the clearance height is actually lower than the portals indicate


And so I come to the word framework in this post's title: as with software, old cars and so on, there comes a time when maintaining the current setup is actually more "expensive" than cutting the ties and starting again. In order to solve some of the main problems with the current diorama, a remake becomes unavoidable. Increasing the radius of the ellipse would require a rework of the track and to do it properly would actually require a new larger base. To fix the tunnel portals would require a reworking of the "mountains" and in combination with the height of the middle section of the tunnel, a rework of the scenery would be required. Adding all the things together should mean a total rebuild.


The down side(s)? The trestle bridge that cost so many nights and and so much balsa and matchsticks would have to be rebuilt. More bridge track may need to be acquired, and would definitely need to be laid, weathered, ballasted and so on. Also some matching coded (height) track for the back section of the diorama that goes through the tunnel. Total re-scenicing would also be required: foam formers, plaster bandage shell, plaster rock facing detail, painting, ground cover, trees, snow...


The question then becomes do the cons out weigh the pros or vice versa? I certainly won't be making any rash decisions until I can attempt to try some of the further fixes like finishing the sides and back and the clamp or threaded rod ideas. After all, the diorama "works": trains go round a Christmas tree, trains go in and out of tunnels in snow capped mountains and over a trestle bridge.


So for posterity, luckily we have cameras to immortalise what will not last forever in any case.

Sunday, 30 October 2011

Thatched Cottages and Auto Trailers

Well October is nearly finished and it is time for another posting. I am being challenged painting a second hand already assembled Dapol OO scale Thatched Cottage The challenge is primarily in getting the effect of the dark timber framing and the whitewashed wattle and daub to be distinct (as they are in real life and probably any model that is not one piece of moulded plastic with raised sections to represent the framing). At this time I am working with paint and brush and not having the best of success.I am hoping that a coat of white over where I got carried away with the black and then using a black marker will give better results. I do not know enough about airbrushing to say that it would be a solution.


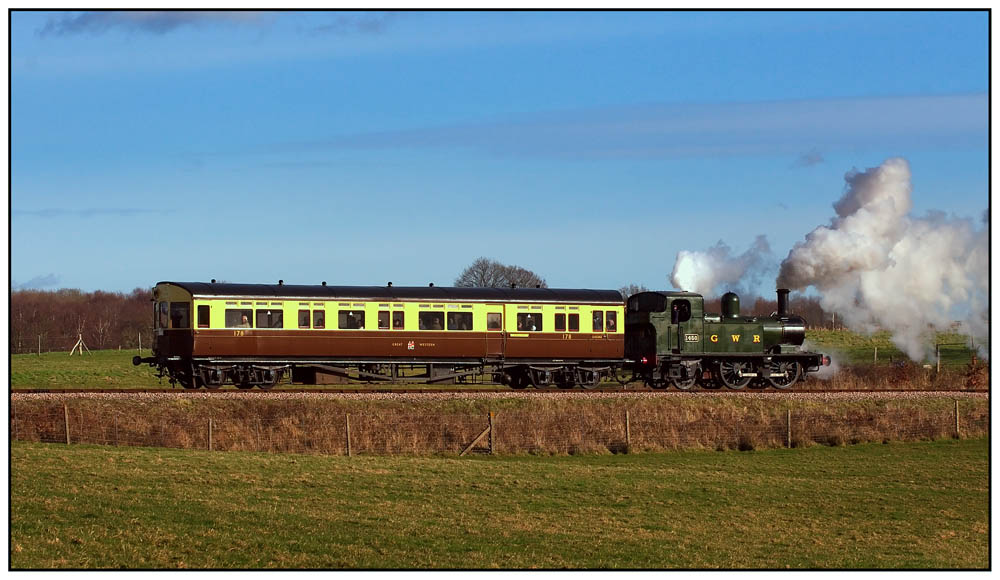
Meanwhile I have gone auto trailer mad. With a Father's day gift of a brand new Hornby 14xx, the perfect passenger rolling stock to go with it is a cream and chocolate auto trailer, as seen here with GWR 1450 in the perfect pairing I am hoping to emulate in model form. Hornby makes runs of the model in BR Maroon from time to time but I don't feel equipped to do a repaint (both with respect to tolling and skill). So an eBay purchase of a second hand Dapol (who inherited the plastic moulds from Airfix) auto trailer in the GWR colours for my intended modelling period has been accompanied by a detailing kit intended for the same model and a reference book about GWR auto trailers for the period I intend to model. Oh, and did I mention that postage on one book seemed a bad portion of the total cost? So I added two other books that feature stations on the Exe Valley line. The book cost to postage cost was still not brilliant, but beat the initial ratio of the postage costing as much as 2/3 as the book price. This seems to be the price of getting hold of what are becoming more rare and specialist materials.


While trains and railways are still with us and carrying bulk materials more efficiently than any other mode of transport, they are not what they once where to society. And of course steam trains and all that went with them have not been part of daily life for many decades now, more than half a century in some countries. While there are heritage railways and preserved examples of the steam age (some still running even!) and people who model these machines of the past, the market for source material on specific subjects must be quite small. Thus it becomes a case of seller's market and what the market can bear, thankfully the Aussie dollar is fairly strong against the English pound at the moment.


The photo for this post shows how bad my attempts thus far at painting the thatched cottage have been. Red outlines show the worst areas, though to be realistic, the whole thing could be one big circle at the moment. How will it turn out? Stay tuned for future posts :-) Next on my modelling calendar is getting the Christmas tree layout up and running, also adding the trees and then putting "snow" on the whole scene.


Friday, 30 September 2011

Rolling along

Train wheels, how important are they? The concept of steel wheels on steel rails is what makes railways more efficient than any other form of transport. It is what meant that animals and humans (before the use of steam or other forms of non-animal power) could move much heavier loads further and faster than over other forms of road. And so it is that I am enjoying converting all the wheelsets of my N scale rolling stock. I am really loving the low friction of the wheels as well as the improved appearance. Lower friction even than some of the older metal wheelsets where the metal was not well polished and so doesn't swish as nicely as the rolling stock does with the smoothly polished wheels.


Speaking of friction, I am learning how much resistance the motion of a steam locomotive (all those rods and levers and things) creates that inhibits the performance of the small and relatively weak electric motors that we power our models with. My N-Scale diesel runs much better than my N-Scale 0-6-0 and definitely as good as my N-Scale Berkshire until I did some lubricating of the motion. The big problem with lubricating models is that models have a high plastic content and not all lubricants are plastic friendly. Also there are the issues that happen in the real thing: "wet" lubricants can attract and retain particles that accelerate wear, any lubricant on the wheel's tyre, slipping can occur, which is undesirable, especially in models with limited power.


One of the wonders of the steel wheel on steel rail concept is that while it has low rolling friction, the wheels do actually grip. Early locomotives were engineered around the assumption that making the wheels rotate would not cause the train to move so alternatives were found until someone actually tried and found that there was and is enough friction for the wheels to drive trains.


Another consideration is conductivity. A lubricant that conducts can cause shorts across chassis, wires, wheels etc. A lubricant that insulates causes the opposite issue: if it gets in the wrong place, it will prevent the intended flow of electricity to the motor. Right now I am playing with a light oil but may go back to powdered graphite. Both have their pros and cons in all respects and only time will tell.


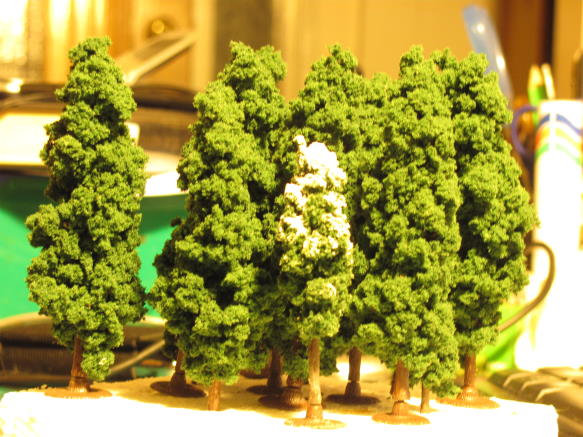
This post's photos relate to trees and glues. I am loving the power of EFD Simply Glues "Trees in minutes II" It does exactly what it says although it smells something toxic and melts cotton buds, or at least disintegrates them. The next step after this will be to apply spray adhesive and then some "snow"


Sunday, 14 August 2011

What to do when the world ends

More work has been done on the bridge (that is actually the ends of where two bridges meet) I mentioned in a previous post. I hope the in position pictures help make some sense of my design choices.


When designing a model railroad many choices are faced. One of the first is whether to copy a section of the real thing or to make it all up. Of course, this choice is a sliding scale where the middle is a model not tied to a prototype but not completely made up by the modeller, phrases like "based upon ..." might be used in a description of a layout in between these points.


Because my N scale shelf layout is only loosely based upon a concept, much of the design has come out of my head. Especially seeing the concept I used as a basis was not a prototype but John Allen's Timesaver puzzle and only loosely so. As a result, the arrangement and make-up of structures has undergone a few iterations in an attempt to come up with something plausible that fits the style I wish to invoke. That style being a switching section in down town Chicago in the 1940s. And yet I model Union Pacific who didn't have rails in Chicago until almost the turn of the century when Union Pacific bought the Chicago and North Western Railroad. Hence this is not based on a prototype when the time period is included in the setting. As result of the style choice, replicating a Chicago skyline is a big factor determining what structures are used. Why Chicago? In it's time Chicago served a huge number of different roads and had the famous train served stockyard right in the city (only the gate to the Union Stockyards remain in the present day) and perhaps most of all, Jack Delano's excellent colour photography of Chicago in the 1940's, for example


Why so many iterations with the structures? In order to make something that is "realistic." This is where following a prototype has advantages: the buildings are laid out in such a way that they "work" in the day to day functions that buildings have to provide. To have a realistic building layout then is just a matter of copying the prototype building layout. I have seen layouts with coaling towers that have no method of being refilled, buildings that have no apparent access, roads that are not shown to go anywhere, etc. All of these may be acceptable breaks from reality but then don't necessarily fit with my idea of realistic (plus the phrases, "break from reality" and "realistic" don't seem to go together well...) As a result, I still have some more track to lay in order to supply coal to the coal tower, build some sort of access to the signal tower, and I am sure there will be other tasks in a similar vein that I have not thought of or encountered yet.


The design of this bridge structure is an attempt to work within the bounds of a layout that is only a foot wide. What does one do when the world ends or the layout edges are met? I have taken the attitude that as the layout represents a slice of a world, so to that world gets sliced at each edge of the layout. The bridge then is sliced at each end to line up with the edges of the layout. The bridge goes across the layout at an angle in order to draw the eye across the layout as the eye also moves backwards and forwards along the length of the bridge, trying to make the layout seem deeper than it really is.


Malkara School's annual scale model exhibition was worth the trip, if only to see what has changed since last time. Exhibition purchases include a Triang brand GWR Colette coach and an assembled Dapol Thatched Cottage, both 2nd hand. Post exhibition purchases include Roof Brown and Reefer White paint, 0.35mm wire for handrails for the bridge and more Atlas 33" metal wheel sets (still more needed to be totally metal in the N scale wheel department...)


Anyway, the photos of the bridge in situ that may or may not explain why it looks the way it looks