Tuesday, 23 September 2014

Modelling water. Or more correctly, making a diorama for the epoxy...

So the weather is better for going outside and it's time to get the Christmas layout up and running. After filing and sanding back the plaster backfilling I had done to the hills, the join line of the two halves of the module had quite a large gap in places. An early attempt to put plaster mix into the gap has failed largely due to me not removing enough material to ensure the new plaster adheres to landscape foundation rather than landscape surface material. As a result, I will have to be prepared to make the gap larger or more obvious by stripping back the surface materials to expose the plastered cloth strips etc so that the plaster to fill the join adheres to "permanent" materials.

So while I had some plaster mix to fill the gaps in the Christmas layout, I used the left over plaster to start filling up the hastily prepared plywood diorama made just moments before mixing up the plaster. Basically it is just a ply tray with "high" sides and then a shaped loop of cardboard to mark the edge of the body of water. Complete with nails poking out of various edges and all, it is only for working out how to work with the epoxy without ruining the Christmas layout. the plaster started well but adding thickness uses up more plaster than I expected. Rather than run out of plaster, I am going to start using my larger stock of sculptamold, something I don't yet like as much as some modellers do. I seem to have learned the way of mixing plaster to a good consistency but so far this has eluded me when attempting to mix sculptamold. And so the learning experience continues as I try to set up something as simple as a diorama in which to learn about clear two part epoxy as a modelling medium for representing water.

Photos of the diorama prior to the application of plaster or the cardboard loop (note the hasty assembly with poking out nails):

And then with the first layer of plaster in and around the cardboard loop sticky taped down to the plywood base:

Second layer of plaster a day later:

Layer the third from earlier this evening:

And so it is that I desire more of a sense of depth before I remove the card and start shaping the landscape more properly than my Dairy Queen hills. The next step then is painting in the extra depth for the base of the "lake" as many books and websites will tell you.

Wednesday, 17 September 2014

The value of close up photography

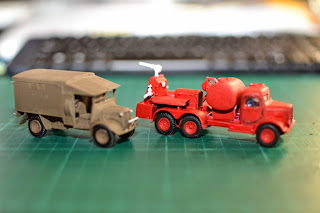
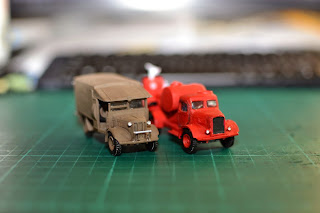
Well I thought that I had done a good enough job with assembly and painting to put the decals on and add a layer of satin acrylic to seal and protect the models. I then took some photographs of the RAF Emergency Set at various angles. Apart from using F8 that did not give enough depth of field to cover the models front to back, the photos worked out alright using the "slow" setting on my camera's flash.

The challenge came when looking at the photos enlarged to nearly full size (I rarely find digital photos to look good at 1:1 in their original format, too many speckles...) and saw all the imperfections in my work. The question now becomes, how much am I prepared to accept the models as I have made them versus how much more work would be required to improve the standard, especially given much rework would be required.

So judge for yourself if models in 1:76 scale need more work before being put away to one day go on a layout or if more work is required. Part of modelling is researching the original, something I am not so great at in the initial stages. I tend to research as I go along and that leaves me with late decisions like this, it's a bit like large software systems in that respect but that's another story.

Thursday, 4 September 2014

Too many months between posts but progress has been made :-)

So I had been thinking about how long it had been since a last post when my wife asked me who I blogged with, and I finally went and had a look at how long it had been since I last posted. The funny thing is that the drought of posts occurred over the winter months when one would expect that as a result of being indoors, one would be posting more frequently. Alas this was not the case so here I am posting about posting.

One thing I have been working on that constitutes modelling is the Airfix RAF Emergency Set vehicles. Looking at the 1:72 figures, they will never look right on a 1:76 or 1:87 layout, the difference being more marked for human figures that we know so well than other layout elements, unless of course one opens the OO scale versus gauge debate.

The project seems to be coming to an end just in time for the weather to warm up outside. All gluing is done and only small areas require further painting. See below the progress between April and today.