Monday, 9 December 2013

End of year musings

So as the year comes to an end, everything gets busy, well, more busy. The current project with a before Christmas deadline is fitting theTOMAR INDUSTRIES Marker lights to the red bobber caboose intended to look like the Little Red Caboose of Little Golden Books fame as illustrated by Tibor Gergely. So far things have gone reasonably well including implanting a reed switch into the caboose roofwalk so that the power from the AAA battery can be turned on and off without having to pick up the caboose or flip some highly visible switch. Photos to come once all is closer to completion.

Meanwhile I need to get into my shed and garage and do a big clean out. Also more orderly storage. Also to finish the many projects that I seem to have things for: kits, materials, etc... In short, a little frustrated at the large amount of stuff that has built up and the small amount of spare motivated time one seems to have.

The Christmas layout has gone well again this year though with only incremental changes again this year. A suggestion of putting in a waterfall comes up against the wintery snow nature of the scene and whether or not to make it a waterfall of icicles into a frozen over lake or just go for a more temperate and traditional waterfall and lake scene. More research required here before one dives in, as it were.

Sunday, 10 November 2013

14xx/48xxs and how not to do it, maybe.

So as has been previously mentioned here, I have been converting my rolling stock to kadee couplers for improved ease of use over the various U.K. toy outline couplers my stock came with. Also for compatibility between my OO scale U.K. stock and my HO scale U.S.A. stock. Of course, this all changes if I ever move to the P4 (Protofour) standard for my U.K. stock and start running them on correctly gauged and scaled track, but that's another story.

The easiest Kadee conversion was my Bachmann pannier with its NEM socket for couplings, it literally made it plug and play, though I did follow some internet advice and get each of the NEM Kadee sizes so I could try for lengths. This was particularly helpful as the 4 sizes are not equally bigger/smaller than their siblings.

Most wagons were a straight forward drill and tap to fit a draft gear box and heights so far have not needed to be altered. The bogie coach was a bit tricky as it was a case of sawing the original metal tension lock couplings off the bogies and then affixing the draft gear boxes to the bogies (Yes in a perfect world the couplers would have been fixed to the coach body but the scale 60' coach on even my largest 23" real life radius curve has too much overhang and would have needed some sort of tricky setup for the couplers to work)

Bachmann Percy took some filing of his buffer beams to fit the draft boxes at the correct height and were glued on rather than fastened by screws which would have requiring drilling and tapping of Percy's running boards. Hornby Thomas was a glue job also, after cutting into the frames to accommodate the draft gear boxes at either end.

My last Kadee conversion project (at least for a while, I hope) was to be the Hornby 14xx and sadly this is where I should have searched the interwebs first. I set off converting with draft gear box accommodation in mind as it had worked fairly well with everything else, right? In this case though I was cutting into a solid metal frame/chassis. When Dapol picked up the molds of this model from Airfix, they improved the electrical pickup mechanism so that it works better for longer than the complicated Airfix wiper mechanism (especially with the small springs that soon stopped springing, among other issues). The one advantage of the Airfix version was that it made replacing the keeper plate less tricky than the new Dapol wipers that Hornby carried on the tradition of. Damaging the wipers or the insulating plastic or both was my chief concern, and I did break some wipers and insulation on my Hornby model.

So after irrevocably cutting out solid metal from the frame/chassis and gluing on the draft gear boxes, I had do some repairs to the wiper mechanism: one wire to the motor had become detached at the keeper plate end, one wiper had snapped off and many wipers had lost their insulation. Soldering was the best bet for fixing the wire and wiper, while gluing thin styrene to the wipers was the fix for those that had become uninsulated. Given my usual results in soldering I was apprehensive about taking an iron to a piece that was so vital to the running of the loco. I am happy to say that with a clean iron, and the job set up gently but firmly in a vice, things went fairly well. At the end of the day, the locomotive now runs again AND has Kadee couplers, primary objectives achieved.

The bad: all the cutting was unnecessary, if only I had thought outside the (draft gear) box and/or done deep enough searching on the interwebs.

The good: 1) I am not the only one to have trouble with the keeper plate, 2) I seem to have become better at soldering and 3) I now have mostly kadee equipped rolling stock!

The immediate future of my 14xx involves some plastic friendly grease to quiet the worm & gear. Then the Mainly Trains body detail kit and eventually replacing the wheels with either some Markit Driving Wheels (BRw14xx) or if I can be patient enough and afford it, the very fine Ultrascale complete set (including metal drive gear, though the mechanism has an intermediary plastic step gear down still). One day of course the whole chassis is a contender for either a Comet or High Level replacement, with DCC sound of course, but that tale has yet to be told...

Sunday, 25 August 2013

The Big Move

Well it has finally happened, the 16.5mm gauge layout is now "home". Wiring was done and finally got things running well enough to do two videos of trains running round the layout so it was time to move the layout into the garage from its previous residence under the covered area that is much more exposed to weather etc. (I even found some bird poop on the table top recently, making me glad I had sealed the plywood table top: wipe off with moist cloth, no fuss)

Trying to get video of reliable running has highlighted an issue with the UK outline rolling stock. The tension hook couplings they have are of varying implementations. Some are quite old metal Triang. Others are more modern Hornby plastic ones that have narrower loops than the old metal couplings. Others are modern Bachmann couplers that are very neat and narrower again than the Hornby ones. Heights are not 100% consistent. Trying out my US outline rolling stock I had much better running. Whilst I do not yet have a Kadee coupler height gauge, it seems that the coupler boxes or installed boxes have resolved to close enough heights to provide much more reliable running in terms of couplers pushing other wagons around in disagreeable ways. Looking around and trying to recall, there is not a single, standard UK outline coupler, everyone has a favourite and best results mean standardising to that on your layout as your own choice (And then there is the debate on automatic couplers versus going all the way for realism with hook and link couplers requiring good eyes, steady hands and much patience). In US outline there is a defacto standard and while the style may vary, they are all Kadee or functionally Kadee clones. Kadee #5s have long been the default Kadee coupler for HO and while newer items are more to scale and so on, the #5 continues to be very popular. Given what I have just experienced I am inclined to continue my favouring of these couplers and am now wondering about a total conversion of my UK outline rolling stock to Kadees. Visiting various forums, many UK outline modellers have done so and some of the issues Americans have with Kadee #5s being overscale for HO mean they will be less so in OO scale. It has the advantage of meaning I can run "mixed" stock together.

Another issue that I suspect affected reliable running seems to be the rolling qualities of the wagons. The wagons that roll down the gradients on my layout all by themselves are metal axled, metal wheeled and indeed metal bogied boxcars. Vary little of my current UK outline rolling stock rolls all the way down the gradients without assistance whereas the boxcars do so from a standing start. So it seems a review of alternatives to enhance the rolling characteristics of my UK outline rolling stock is required.

The worst runner continues to be the long wheelbase Hornby Thomas who is not helped by the quality of the wheels in terms of flange size and tyre width. All these properties plus a low weight mean it does not negotiate the Peco code 75 crossing or the Walthers code 83 pointwork without some misadventure. The Bachmann Percy while also a light locomotive has no such issues but suffers a little from having only 4 wheels if wheels and/or track get dirty.

Speaking of dirty track, a 1200mm by 1200mm baseboard set into the corner of a garage (hard to reach the far corner) with truss bridges (too small to put my hand inside) mean that not all track is easily accessed for wiping with a cleaning cloth. Thus something to put on my shopping lost is a track cleaning wagon. The piece de resistance of track cleaners is the CMX clean machine but best costs most and the price represents quite a bit of other kit. A cheaper alternative might be to try incorporating this roller into a BR brake van I already have. Time will tell but I think the cheaper solution might be purchased first.

Anyway, the moment I have been waiting for is here and so a photo to celebrate. The level was still there after shimming up the layout. The 0-4-0 Dockside up the back was used for ensuring the wiring had survived the move. The Roundhouse boxcar has kadee 501 trucks with metal axled metal wheels (I suspect Inter Mountain but cannot recall) and kadee #5 couplers. The only negative aspect was that I painted it all silver but have no decals as yet. A model train guys hobby is never done, else what would be the point!

Saturday, 17 August 2013

Capturing the moment

So recently family and I went to this year's Malkara scale model exhibition. DSLR in hand I hoped to capture things better than with the compact. It would seem that the challenges with the compact are not that different with a DSLR. Models are small so getting in close is important. Light levels are generally low as most models are exhibited indoors. While landscape is a good subject, photographing the powered models is the real aim. Depth of focus is important, often I want a high depth of focus for two reasons:

  1. 1) So that more of the model and landscape is captured
  2. 2) So the camera is more forgiving in its focus.

Here comes the dilemma: capturing low light and/or moving objects generally means an aperture set to as open as you can get away with, while a high depth of focus usually means setting the aperture so only a pinhole of light gets in, keeping all the light rays straight on the same point of the lens. Playing with high ISOs can compensate but the higher the ISO, the lesser the picture quality due to noise. All this to say that many of my shots turned out one or more of:

  • blurry,
  • out of focus,
  • too dark,
  • grainy

Meanwhile the 16.5mm gauge layout continues and is down to electrical wiring before being moved in to the garage finally. Winter in Canberra is not conducive to much work out side and life gets both busy and tiring such that modelling activity slows down over that period. Soldering of wires seems to be getting better but up was possibly the only option for my handiwork. While I am wiring the layout in a block/cab fashion, I still only have one DC controller so really they are just isolating sections. DCC thoughts are starting to run around my head though and perhaps the leap will come soon. Price is still the big barrier. No matter how simple a system, making a full switch from DC to DCC involves quite a bit of kit. Some advice says start with the decoders first. As far as I can gather that means running locos on DC with a DCC decoder that handles DC power without frying. As I am keen to use sound, I will have to do further research as to what happens with sound decoders running on DC:

  • cooked decoder,
  • decoder that just lets the loco work with DC control or possibly,
  • a loco that works on DC control with some sound (that would be nice :-)

THe other barrier to DCC is my soldering skills which are improving but are not necessarily up to electronics yet. Given that only one of my locos comes with a DCC socket, I will need to do many conversions. On top of that, the one with the DCC socket does not have room for a sound decoder if the socket is used instead of soldering the decoder in.

Roll on the warmer weather as spring comes soon, more outdoor goings on to look forward to!

Wednesday, 29 May 2013

Signs of the times

Something I have noticed lately is the challenge in the search for reference materials for things of the steam era. The earlier you go the more challenging it gets. One barrier that hits harder in the U.K. than in the U.S.A is the take up of colour photography. For my N-scale United States modelling there is no better colour photographic resource than the photos of Jack Delano. Sadly I have yet to find anything similar for the UK that is in colour in the 1940s or earlier. U.K Train photographs in colour tend to be from B.R days post Nationalisation. Mind you if someone can show me otherwise I would be most grateful :-)

Another thing that has made things challenging is the decline in books available new. I have been fortunate enough to get a mint new copy of John Lewis' "Great Western Railway Auto Trailers: Post-grouping and Absorbed Vehicles Pt. 2" but in searching for Part one more recently, I have only been able to find second hand copies. Not that there is anything wrong with that but to me the next step is that it is not available at all, which is an issue. This is only a specific example of many cases of trying to chase down material that has led to trying to find new avenues.

For the 16.5mm gauge (HO/OO Scale) layout I am working on at the moment, there is a siding that will be al the better for an engine shed. For extra interest I thought I might see if I could model it on something from the Exe Valley line. Turns out Tiverton Junction had a single track engine shed that seemed a good fit (though as the siding is so close to the edge of the layout, the shed will be truncated in at least one direction) So I looked through my books and did find some good photographs. Did I mention the photographs are black and white, all of them? Many modellers talk about making a model form photos and that's well and good but it is nice to be able to work with a dimension or two to get one started. So I tried searching for a plan or similar. I found mention of one here and at the time there was a link to a location in an archive in the U.K. Using the link I emailed the site to enquire about options for getting a copy of the document. The staff at the archive sent me a work request form to cover costs which I completed, scanned and returned. Having exchanged money for services, the archive staff then sent a high resolution set of scans of the blueprint. Doing some aligning, stitching and then finishing up, I have a plan that shows all the main dimensions of the shed including the smoke chimney.

So things have got to a whole new level (or depth depending on your point of view) for me in terms of acquiring material. Overall the experience has been positive though next time I might see if I can get multiple documents for the half hour of service you pay for.

The 16.5mm gauge (HO/OO Scale) layout I mentioned above will hopefully get photographed soon to add to an upcoming blog entry. Until next time.

Wednesday, 17 April 2013

1:1 modelling

Something that has been taking up modelling time lately has been modelling in 1:1 scale, or making things in real size. It is interesting to work in such a large scale where mistakes of measurement are less conspicuous and critical.

The underside of the Airfix Autocoach is "complete" and now I have all the bits for the top side including flush glaze windows and coach advertising posters. Also the sitting figure and a standing driver. The reality that does hit me though is that this will be very much a display model until such time as a suitable layout is constructed

This is only a short post and I thought I wasn't going to sneak any photos out till I did an entire story on the autocoach but here is one, done with tripod to get a good depth of field with no flash: loooonnnggg exposure time

The rodding along the length is now painted black which tends to obscure the detail a little, I think.

Friday, 25 January 2013

Of screw link couplings and things.

Well my autocoach now has a screw coupling on one end. The end that will not and indeed cannot be coupled once all the super detailing has been added. It adds to the aesthetic of the model and given what the instructions say, it is good to have it mounted prior to adding the details under the coach. The screw link coupling was purchased at City Models in Perth. I certainly did not expect that on my holidays I would walk into a hobby shop that would have a stock of such an item on the shelf, but there you go. Nice shop though many wives including mine have requested a waiting couch to no avail. Imagine how many more purchases husbands would make if they were not being harassed by tired wives?

While in Perth we also visited Mayland Model Railways which has a new location just down the road but much bigger than previously apparently. While there I purchased what I suspect is a Ratio kit of a GWR toad brake van fully made up, painted and decaled. The only thing that makes it less than perfect is that someone had mounted knuckle couplers rather than any English/European style alternative. This is of course quickly remedied. Indeed as it is a brake van that theoretically is always on the end of the train, it will be a perfect spot to hang the other coupler from the opened pair of screw couplers that the autocoach has the other member of :-)

The other hobby shop we visited while in Perth that deserves a mention is Stanbridges which covers quite a range of hobbies including model trains. I did make a model trains purchase, FLEISCHMANN Locomotive Lubricating Oil I also made some Airfix plastic model purchases: the RAF Emergency set and the Aec Matador and 5.5" gun. Why these? Getting vehicles that fit a specific era can be quite tricky and these certainly satisfy the era I seem to be gravitating towards, even if Devon's Exe valley may not have seen a lot of military traffic. The Matadors were used for all sorts of things, ditto the Austin vehicles in the RAF emergency set.

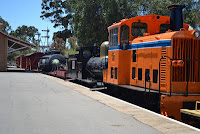
In real train news, Australia is replete with old stations that have rolling stock parked on a length of track going nowhere. The town of Merredin has made a full museum around such a feature that is well worth a visit. I wonder what the future holds for some of these locations and the heritage stock they possess. Volunteer groups do seem to be trying to maintain them against the elements but it is a bit hard to draw custom to a static exhibit unless it has something extra to offer like at Merredin. Steamtown in Peterborough is also an awesome example of what can be done but it does own some working examples to add interest. The Pichi Richi Railway though is the full deal, an operational railway with working diesel and steam motive power and heritage rolling stock to match. Just make sure you don't go between November and March like we did as the volunteers are taking a well deserved break and the trains are not running and the workshop tours are on hold.

The holiday may go towards explaining the lack of posting in the last months. Another factor is that even had I considered posting, interweb connectivity and mobile phone coverage is hard to find along the drive to Perth from Canberra.

So without further ado, the photos of the things mentioned, or some of them at least: