Monday, 29 November 2010

Let it snow, let it snow, let it snow!

So December is just on the horizon and that means two things:


  1. time for a post and

  2. I better have the Christmas tree layout nearly ready.


Well the good news is that trains have recently done multiple laps of the layout successfully. The not so good news is that after getting the bridge track fixed to the trestle bridge and then the joining pieces matched up to provide nearly seamless trackage, I have started on further enhancements to the visual appearance of the layout.


So far :


  • the track has been rust painted (and the guide rails too)

  • the tunnel interiors have been painted dark brown

  • a layer of plaster has been applied to the mountains to cover gaps and add further features to the mountains

  • the trestle bridge was painted a more woody and less matchsticky brown prior to fixing the bridge track


Over the next few days (mostly nights really) I plan to:

  • glue the guide rails to the bridge track

  • paint the sleepers a consistent brown and while doing so cover any glue and nails/track pins

  • sculptamold the areas of scenery that have not been augmented by plaster as above

  • cover the "snow scaped" scenery with some form of snow material, having most recently seen this at Fisher Discounts


It all looks like being "on track" as it were. When the 0-6-0 that I like to think of as a substitute 4466 ran smoothly around the tracks and then with a boxcar and train of three overton coaches did the same thing, it was a beautiful moment of model railroading. Especially with my daughter at my side eager to see the train go in and out of the tunnels and over the bridge. Another beautiful moment occurred when my Berkshire (never run on Union pacific but this is my railroad and she does look good in UP colours) also ran the length of the bridge smoothly and with ease. The downer being that on the minimum radius parts of the ellipse that occur near the tunnels combined with the narrow tunnel portals to make the locomotives overhang too much for her to go all the way around.


To me the running of trains is one of the magic moments of model railroading. I like making the models and completing a project and so many aspects of model railroading but my favourite part is just watching trains in motion. Canberra is a place this doesn't happen an awful lot compared to when we lived next to or near the Ipswich rail line in Brisbane which had the beauty of being a passenger and freight line as well as being on the way to the Ipswich Railway Workshop so a steam locomotive was not out of the question. So for now, much of my enjoyment of trains comes through my modelling. That will have to be enough good times and memories in miniature and life size for this entry, night all.

Sunday, 31 October 2010

OO Superquick platform and buildings

Before October passes by without an entry, here is the 90% complete OO Superquick platform and buildings. Following the advice from a hobby shop owner in Brisbane some years ago now, I reinforced the building interior with matchsticks and paddle pop sticks as I assembled. The aim is to prevent the cardboard from warping/sagging with age. Well hopefully I made it strong enough :-)


Because the kit did not come with the usual marked windows and glazing, I went to the parts box and got some clear plastic. But checking against depictions, the framing in the glazing is an integral part of the appearance and roofs of models are what get seen the most. So off to Fisher Discount for some plastic bits. Is there nothing that Evergreen doesn't make?


Some super thin strips for the glazing and some rod for the down pipes: chuppa chup sticks being too thick even in OO scale :-( The extra detail parts are still outside drying from being painted and not installed in the below shots. Also some in progress shots to show how much fun you can have with bracing and strengthening.

November tomorrow means I better get back to the Christmas project: painting trestle bridge and them laying track and joiners is top priority. Some tunnel enhancement would be good. A proper coating of scenic material would be nice... Stay tuned!


Wednesday, 29 September 2010

Post Script: Decals

They are as easy as it reads in the July Model Rail Magazine. Results may be better with all the chemical setters and stuff, but I had tweezers, a bowl of warm water, scissors and a knife. And looking at the enlarged photos, there are alignment issues that will get better with practice, I hope.


How does it look?


I thought you'd never ask :-)


Tuesday, 28 September 2010

Haven't forgotten my blog...

Okay, testing my skills on the bridge track and so far it works well and is "easy" to use. Have laid down a loop that had a length of bridge track in it. I was able to then lay the two guard rails and fasten them with super glue, as per the included instructions. Things learned? The loop was tighter than NRMA standards but still the guard rails bent to shape easily and I was able to super glue them in short distances at a time. Because the loop was tighter than NRMA standards, I learnt another possible reason for the standards: material memory. Bend a piece of cardboard a little way and it springs back. Bend it a lot and it will retain the kink. So too with nickel silver rails: the too tight loop ended up with some kinks instead of the smooth curves possible with larger radii.


Now to other things happening in between weekends. Two wagon kits: a 12T van and a BR brake van. The brake van got painted prior to assembly and then some more as assembly progressed. I have yet to affix the decals because this would be my first time doing decals. One of the issues I have with decals is the age of the kits I have dealt with in the past and whether decals have a use by date. The other reason is the prospect of doing a new thing wrong. Writing this, the worst that can happen is the decals don't turn out and the model looks as it does now without the decals. And a recent purchase of the not so easy to find Hornby steam roller. Work has commenced on assembling a SuperQuick station island platform and platform buildings.


P.S. Loving the AUTO setting up close on the Canon SX120IS!


Friday, 13 August 2010

Bridge track and exhibitions

Well folks the bridge track finally arrived. After them getting the wrong stuff, they then got the right stuff. They said they could bring the right stuff to Malkara Exhibition, that sounded great. Anyway, in the end they posted it out at their cost (cause they forgot in all that must go on in getting a stall at an exhibition) and I have put together a barrel platform. Was the wait worth it? The track looks great and the extras add so much authenticity, the instructions imply that people who buy bridge track are too hardcore to need pictures, I have yet to set up a test of the guard rails etc, but I will be putting word and pictures up when I do. Will I be ordering through them again, sadly no. In future the Internet will be my friend. That doesn't mean overseas per se, but an automated order system seems to work better. Malkara was good with a new better camera, it makes a big difference to the shots one can take. Many similar exhibits as previous years, also got to see the model club in action and I feel that I am perhaps too young and not quite serious enough to meet the cut, pity. Anyway, this is just a quick post to say track has arrived so work will soon be resuming on those projects that went on hold. As a little aside, doing a small diorama of a work site with a pile of ballast, it was meant to be a cone and I will try to bring it back to a more regular shape but the water glue mix was too much water and not enough glue at first. Photos when it looks passable. Just gone from being late to being early so time to sign off.

Friday, 16 July 2010

Results so far...

Okay, so the shop calls me to say the HO track has arrived, but I wanted N scale. The track that would take 5-6 weeks back in April. So a special order that should only take "2-3 weeks." So here I am trying to support Australian hobby shops but I have to say the results have not been in my favour. More news when the track fianlly arrives but not a great experience so far.

As for the model railway group, I have to say my experience was okay but I will not be joining just yet. Why? To avoid having to keep up with the Joneses in terms of moving to DCC, upgrading all my equipment to fully detailed replicas and so on: the majority of guys there are much closer to retirement than I and so don't have the kids/mortgage/space issues I do at present. Good to try, not willing to buy juast yet, but I will keep it in mind.

But, here is the issue: I have been reading about the loss of skills associated with steam engines etc. Trains and model trains tend to be hobbies of older, well, men mostly. Younger guys do not have the time money and so on to carry the torch which may burn out before they get their lives together to do some carrying. Food for thought perhaps.

Those who care about trains and especially steam probably already know about this but passed through Maitland recently and discovered they have an annual steamfest that has multiple, multiple, steam engines! So book your holidays for April next year folks.

And becuase I've been a little short on the pics in recent posts, but also because we have a new camera that is quite good (for our budget anyway), enjoy some westinghouse pump shots of 2-4-0 1042 currently under cover in Maitland but set for restoration and much goodness.


Sunday, 30 May 2010

Modellers, rivet counters and DCC

This weekend I met a fellow train modeller who exhibited none of the traits I worry keen modellers might have. Let me use the term rivet counters to separate the ones I worry about from the modellers who do have social skills, are not obsessive over details, and do not make one uncomfortable after more than five minutes in their company.


This modeller is a member of a train modelling club in my vicinity who runs DCC and knows other who do the same. This raises some interesting questions. Given an invitation to visit the club, am I willing to subject my modelling skills (or lack thereof), modelling philosophy, railway knowledge and perhaps most importantly the family budget to being part of such a group? Will they all be as sociable and personable as my initial contact? Will there be rivet counters who will deride my 15" radii in HO scale, my not complete vale gear on my 0-4-0 dockside, the TYCO(c) trains from my childhood that now enjoy Kadee(c) couplers and metal wheel sets but still have the original crummy detail? Stay tuned, the evening of the first Wednesday of every month may become booked up in my calendar, if I am brave enough!


The other big question that comes to mind is of course, to DCC or not to DCC? Cons: cost, difficulty of fitting decoders in N scale locos, cost, poor soldering skills, cost, fitting sound decoders plus speakers and cost to name the big ones. Pros: the possibility of sound! (huffing and puffing when starting, screeching loudly when stopping and Westinghouse(c) air pump wheezing away when idle, the mind boggles and the ears tingle: samples of Tsunami(c) brand decoder sounds here) carriage and locomotive lights acting independently of whether the locomotive is moving while still being consistent with direction of travel, low speed control even better than pulse control, and the big win: independent control of multiple locomotives on the same piece of track (no more twin cab control that attempts to emulate this but relies on each train being on an isolated section.) This is the dream of those who wish to follow prototype operational practice: double heading, helper locomotives only for the hill run, trains dancing a full ballet as the system moves goods and people from place to place...


Currently the answer is not to DCC, yet. While work proceeds on getting the current N-scale shelf layout more scenicked and up and running again, re-tracking and scenicking the N-scale Christmas project (when the track arrives...), scenicking the HO 4' by 3', setting up an Auto Distribution Facility diorama, planning the larger HO hole in the middle layout plus there is that thing called living that also seems to take up so much modelling time. Funding those projects and real life are also the current priority. Speaking of real life, that's it here till next time folks!


P.S. A picture of what is definitely one of the smallest decoders, courtesy of those clever Germans at ESU/LokSound


And for those with a ruler, it is 13.5mm x 9.0mm x 3.5 mm. For the Australians in the audience, it is slightly thicker than a $2 coin BUT in length and breadth fits inside the coin in the picture which looks dimensionally similar to an old Australian 1 cent piece!

Sunday, 9 May 2010

Thomas, trays, timber cutting

Well at least it's closer to the Friday night than last week's entry ended up being. So the Thomas part: my daughter has had a chance to run her Thomas without issues on the over and under HO layout. Hornby's 0-6-0 Thomas has quite a long wheel base for the 15" radius inner track on the over and under HO layout so track joins needed to be tweaked for smooth running. Of course this has pay offs for all locomotives and rolling stock too, everyone runs better over those joins now.

The over and under HO layout now has a tray underneath courtesy of my most recent Bunning's outings: some 12mm plywood and some pine edging/reinforcing. The tray allows me to store unused rolling stock on a piece of track under cover also storing tools, spares, parts and so on. The plan that has already started is to then clear off the tops of the workbenches so that they can be workbenches not just storage.

The second piece of 1830mm * 945mm ply has been divided up into two Ls and some carefully planned pieces to create a layout 1260 * 2115mm with a 630 * 1485mm cutout in the centre where scenery, backdrops or even a male 30 something waist line will fit.

The lesson about measuring twice and cutting once was learnt when making the tray which needed to be shortened after being initially cut, that would have left me with more spare for the auto loading facility :-( As to the cuts I made to divide up a whole board into the layout with cut out in the centre, I made all the cuts I had thought I needed but when laying out the pieces, things did not look right: I had to cut off "E" as marked on the pictures below (not very to scale, the shapes are the important part) Now if you have a look, it is possible to mark out cuts that did not require an extra cut for the "E" piece, BUT this would have required a cut that did not start from an edge and would have required jigsawing or similar, not a nice quick cut with the circular saw.

So while I wait for my bridge track, I have track plans to consider and how to layout the auto facility diorama...and bridge work for my N scale shelf layout when I feel keen enough.

1830mm * 945mm board marked out for cutting:


Resultant 2115mm * 1260mm layout with hole for operator and/or scenery in the middle (width of each layout section is 315mm):

Monday, 3 May 2010

Non-Friday musings

The plastered augmented bridge abutments have had a wash of brown put into the cracks in the stone but due to the greater depth in the plaster cracks, the wash has accentuated the depth difference further. As a result, I wish to deliberately add some grey to even out the perceived depth so that the plaster stonework appears to match the stonework in the moulded plastic abutments.

In turntable news, I am trying to get a good feel for the colours that an operating turntable would have had back in the glory days of steam. The trick being that colour photography and the glory days of steam only overlapped slightly, and like so many things, nobody felt that some things were worth taking colour photographs of until they aren't there anymore. The turntable at Cheyenne that turns UP 844 and UP 3985 is the spiritual parent of my turntable, even if it is probably larger and has the hut and is much fancier but the Walthers 120' manual turntable beats any of the other N-scale turntables bar the new and fully sick Walthers 130' turntable that costs multiple hundreds of dollars, not the $50 something I spent :-)

Still waiting the arrival of the Micro-scale bridge track but that was as expected.

Recently spent too much time at Bunnings again and they had some 1830mm x 945mm x 12mm 5 ply and I picked up two: one to augment my 1200 x 900 HO table with an under shelf. The remainder of that panel will also allow me to do two things: 1) create the engine servicing terminal with the turntable, round house and coaling station, and so on. 2) create a setting for my HO auto facility mentioned in a previous blog entry. The other panel will one day allow me to do another HO layout with ever so slightly larger radii, maybe even the 18" that NMRA says you should not go below. Also the extra length will allow for gentler grades, longer trains, space inside the loop for switching interest, all the good stuff.

Saturday, 24 April 2010

Plaster and stuff

Modelling stuff continues, albeit slowly and I missed the weekly deadline of last night for an update but there you go. For the middle support for the rail bridge mentioned last week, I had long ago ordered two Chooch Bridge abutments with "steps" to nestle the truss bridge into. BUT, traditionally these appear on opposite ends of one bridge and merge into a hill or elevation at both ends.

For my application, the two abutments needed to face outwards and be a single support. An early trial with a layer of plaster sandwiched between the two abutments failed on many fronts, most importantly in alignment. Trial two, now on its way to being the real deal, involved a non plaster mounting to ensure proper alignment and the plaster would just be decoration. Out came the Tarzan's Grip and a small rectangle of 5-ply. So I now had a bridge support sandwich that needed plastering.

The batch of plaster I have has instructions that rely on weight measurements of plaster and water. The chief catering officer was not even approached about borrowing the kitchen scales, instead I used my usual kitchen technique of "Add stuff still it looks right" And so far it has worked for what I am doing. Excess plaster has been adding to the mountains and valley in the Christmas project, so that was handy too.

The bridge support sandwich then required matching texture and colour wise. Out with various files and knives to file and scrape mortar lines into the plaster to approximate the moulded stonework on the abutments. Acrylic paints work fine on plaster and are water cleaning which is always nice. See pictures below for bridge support so far. More work will be done to meld the abutments with the plaster visually, more photos will be taken when I am happy with the results.

Friday, 16 April 2010

Turntables and Bridges

In an attempt to make this a bit more regular, a Friday night offering. Current projects underway include the Walthers 120' manual turntable having been assembled and now being painted, assembling my road bridge for my N-scale shelf layout, and making up the rail truss bridge; also for my N-scale shelf layout. The turntable will be an extension to the current N-scale shelf layout. The extension will also provide a location for the multi track Cheyenne coaling tower/station (still in box) and so far a 3 stall Atlas round house (also still in box).

The bridges are designed to disguise the current ends of the N-scale shelf layout by obscuring the fact that the "world" ends and the track goes nowhere. Both are designed on an angle to draw the eye across the layout as the eye travels along the bridge: optical tricks to make the shelf appear wider than the 305mm it really is.

The rail bridge has the added complexity that I wanted it not to be a single span across the width of the shelf. To facilitate this the truss has been sliced in two at an angle so that the cut ends represent the edges of the world (front and back of the shelf). The two bridge entrances will face each other in close proximity on a bridge support that is made up mostly of two bridge abutments facing outwards and plaster to make an interface between the two abutments. As an additional optical trick, what will be the front section of truss is 2/3 of the bridge's original length and what will be the back section is the other third of the length.

While pictures would paint a thousand words, until the various projects are fully realised, those words might be along the lines of "what the?" so this entry has no photos, which helps with the more regular updates thing also!

Sunday, 28 March 2010

Canberra Model Railway Expo

Well, after getting lost on the way and pulling up in the car park to realise I had my camera case but not my actual camera, we were off to Canberra Model Railway Expo at Kaleen high for the first time in my experience in Canberra. Without camera and with children a little antsier than usual, was it worth it?
Yes:
1) My Daughter now has another present for her birthday and she finally has a Hornby Thomas to go with her Bachmman Percy.
2) I found out about Micro Engineering bridge track for N-Scale, explained a bit here: Micro Engineering bridge track for N-Scale This will get the Christmas round the tree project back on track :-) Hand laying options in N scale were scarce and the possibility of guardrail made it even more difficult. Thanks to the nice folk on stand 27 "South Bend and Hilltop Railway" who were happy to answer my query about the track they had on their bridges that I was happy to find was "ready made" rather than requiring any hand laying type complexity. In addition the folk on the stand pointed me towards a vendor who, "Didn't have any here at the show but we have had it and we can get it in for you, here's our card.." I will report my retail success when that journey is complete. Anyway, some photos...


Thursday, 4 March 2010

Non-train modelling

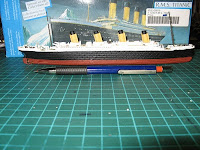
Well, in order to keep this blog afloat (boom boom), I choose to come in for a quick update on the most recent modelling project: a 1:1200 Titanic by Revell. Apparently it is one of the top ten tackiest ways to remember the disaster and looking at some of the things sold as aquarium toys, yes they are tacky, but I wanted a Titanic in my aquarium. As someone with some interest on the topic, I wanted it to be a more true representation of the ship that was, the question was though: do I do the wreck or the boat? If you model the wreck, how far do you go? Thousands of rusticles, crumpled decks, missing funnels, split in two, debris field.... and so it goes? Or just gently sink the ship whole as many thought she was until 1985 when she was found by Dr Bob Ballard. So the model has been painted as she was when afloat but the lifeboats have been tactfully removed or left off. And here are some photos, getting better with the camera, sort of, but close ups are tricky still and yes, now she has been glued together, some paint touching up will occur before she takes that last fateful journey...


Wednesday, 10 February 2010

How do cars get off the end?

"How do cars get off the end?" My daughter is the happy owner of a lovely illustrated children's book called "Crossing" by Phillip Booth with Illustrations by Bagram Ibatoulline. The book has people waiting at a railway crossing counting the cars (wagons) in a freight train. One of the cars (wagons) is an orange open bi-level auto rack with black cars (automobiles) on board (and yes, the play on words between cars and cars is part of the story...) During our night time reading my daughter had clearly been doing some thinking and asked, "How do cars get off the end?"

How better to explain than showing it in miniature? And so was born the latest "completed" project.

Being the extremely happy new owner of Walthers Auto Facility which are no longer available from Walthers and can only be found intermittently on e-Bay or in my case, down the back corner of my LHS! So I had me some ramps and some buildings and other bits, now all I needed was a auto rack... or I could take a page out of early prototype practice and build something on top of a flat car I already have. Styrene is my best friend for this sort of job. Some sketches and a cardboard mock up later, I was cutting up sheet styrene into all sorts of shapes as strengthening became required in various dimensions.

Anyway, everything needs painting (but mostly the white auto rack) and the building arrangement needs to be finalised with access roads (unless I build a long and narrow diorama, but that's another project for another time) so enjoy the pictures that try to tell a story better than my words.

Oh and the answer is: down a ramp that the train backs gently up to or for a train of auto racks, along ramps between cars (wagons) till they get to the end car (wagon), and down the ramp.


Tuesday, 19 January 2010

First project for 2010, sort of.


Well after receiving some Christmas gifts, it was off to the L.H.S (local hobby shop) for some supplies. Metal wheel sets for my HO rolling stock, couplers for my HO rolling stock (While I love the Kadee #5s I had been replacing my Tyco X2Fs with, Bachman EZ-mate IIs are much cheaper, I will have to wait and see how the plastic EZ-mates versus the metal Kadees go) paint (Engine Black) and glue.
I also bought some materials for a HO engine shed type arrangement:
  • styrene sheet for general construction
  • corrugated styrene for the roof (later realised some sort of tiling material would have been better but it looks okay so far and will look better with roof type paint)
  • a stonework material that has a layer of moulded rubber textured to look like stonework, a layer of foam and a layer of the same rubber on the other side but with no stone texture.
The shed was to cover a single line of track for as much length was practicable to allow some rolling stock to hide from the dust on the layout. With dimensions based on the location, clearances for my rolling stock and a fairly simple peaked roof box design concept, off I went. The stone material looks great and cuts well with a sharp blade. Roof ridging was redone with full length strips when one of my children was honest enough to point out the roof looked, "bumpy". So please enjoy the picture that shows the current progress on the shed (To be done: painting, drainpipes, hinged doors and anything else I think of on the way)

Wednesday, 6 January 2010

Christmas Project In Pictures

Hope these are in order, some are definitely out of focus but all I have for some key steps.
Baseboard:

Baseboard:

Baseboard with foam dry run:

Baseboard with foam dry run: (is it just me who has uploaded images rotated for me?)

Tunnel Portal:

Bench work and track work (coloured caulk is the shizang for laying track & cork):

In the December 1983 Australian Model Railway Magazine, John Burgoyne quoted 'the finest model engineer I have ever met' by saying, "the most complex structure on this earth is no more than a collection of simple parts properly designed, carefully made and properly assembled." These words were also a caption to a shot of a trestle over Barhon's Gorge, and I mention it here as the bents of the trestle are assembled with what will form the trackbed:

Trestle assembly:

More trestle assembly:

Still more trestle assembly:

Yet more trestle assembly:

More and more trestle assembly, it was great to see the bents becoming part of something bigger:

Possibly the last trestle assembly for a while:

And now for the plaster bandages over the foam form work (and no, that's not a typo or double up):

Those tunnel portals with matching retaining walls, painted and in place:

And the tunnel opening on the other side (the newspaper is to protect the track from plaster drippings):

Pegs to hold the bridge siding on to match the curve:

And the whole lot as it was for Christmas 2009:

And a close up of the family on the hill with a little help from a photo editor for the sky:

And as it looked under the tree: